How to Build a Local Voice Processing Workflow in 30 Minutes: Voice Cloning, Transcription, and Audiobook Generation
A practical guide to setting up VoiceStudio on your local machine. Learn how to clone your voice from a 5-second recording, transcribe audio files with timestamps, and generate audiobooks using OpenAI-compatible APIs — no API keys, no cloud services, all data stays on your computer.
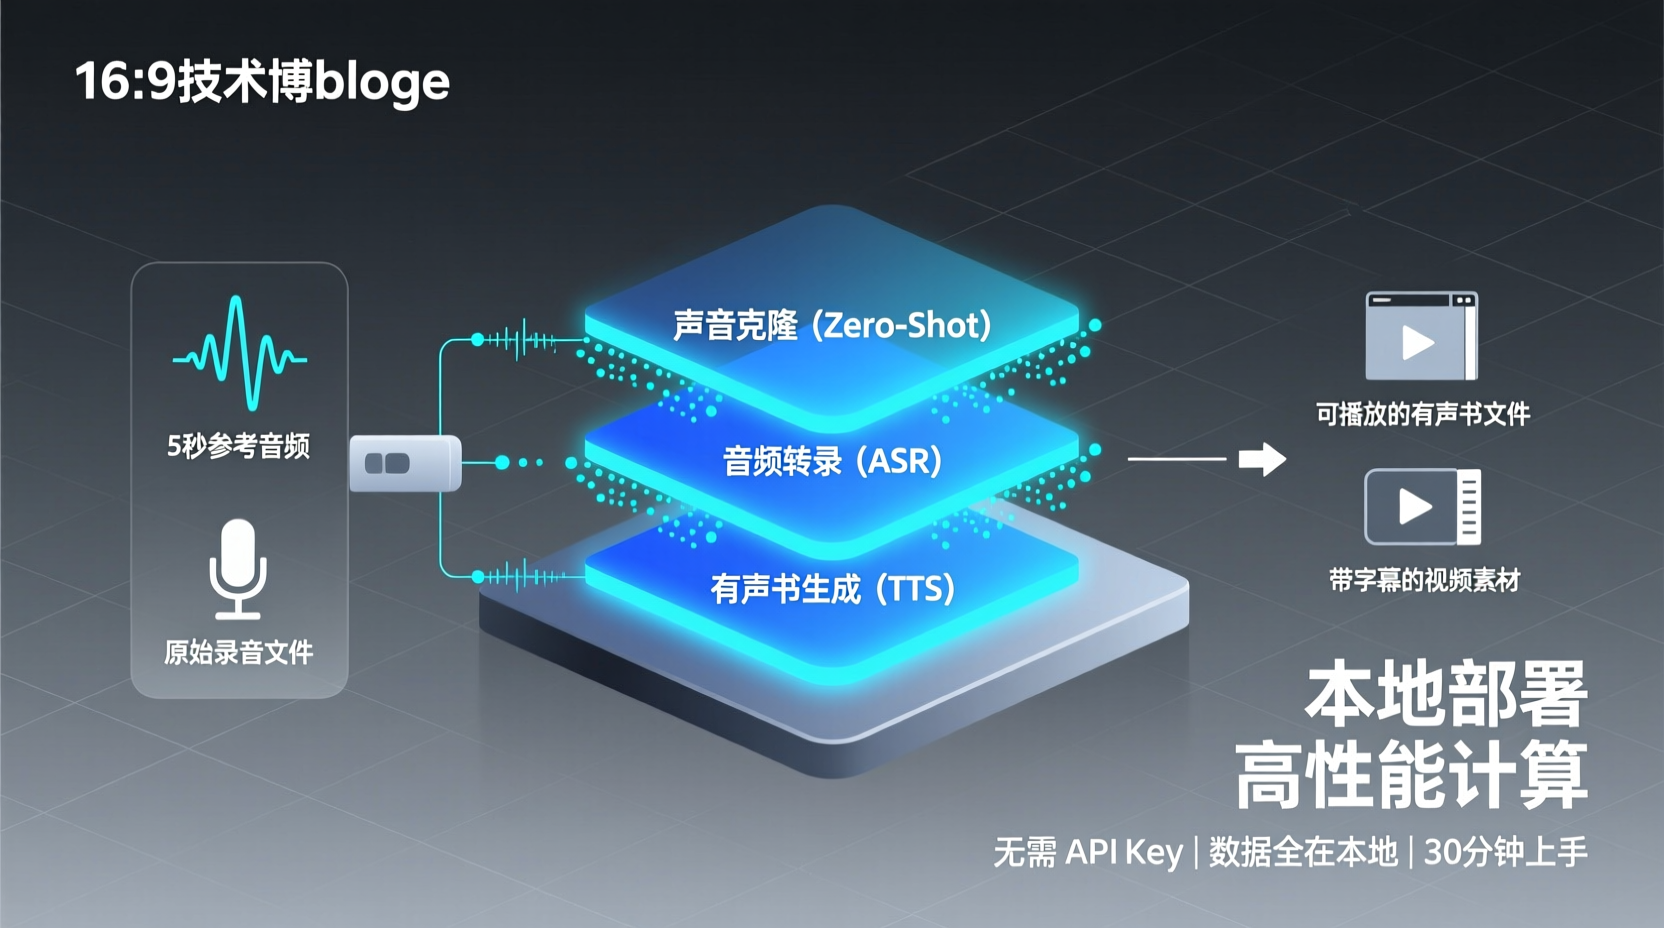
How to Build a Local Voice Processing Workflow in 30 Minutes: Voice Cloning, Transcription, and Audiobook Generation
First, let me explain why I'm writing this tutorial.
Anyone in content creation knows the dilemma when it comes to voice processing — whether cloning someone's voice for a short video dub, or converting a recording into subtitles. Currently, you have two options: use online services like ElevenLabs, pay per word, and send your audio data to the cloud; or wrestle with a pile of Python libraries, spend hours configuring environments, and end up with worse results than paid services.
Last week I had a requirement: convert several technical articles I wrote into audiobooks for Bilibili. After calculating costs with online services, it would cost dozens of dollars just for these articles, and I didn't want to send my original audio to anyone. That's when I found VoiceStudio on GitHub — a fully local, open-source voice platform that supports voice cloning, video dubbing, audio transcription, and audiobook creation, covering 646 languages, with 16 TTS engines and 11 ASR engines to choose from. The best part: no API keys needed, no subscriptions required, all data processing stays on your own computer.
The goal of this tutorial is straightforward: spend 30 minutes to get these three things running on your machine:
- Clone a voice (mimic a voice tone from just 5 seconds of recording)
- Transcribe audio files (convert mp3 to timestamped subtitle text)
- Generate an audiobook (use a cloned voice to read an entire article and export as audio)
No need to worry about the source code, just follow along. Let's get started.
Prerequisites
VoiceStudio is a desktop application (Tauri-based Rust shell + FastAPI Python backend), so the barrier to entry is actually quite low. Your computer needs to meet:
- OS: macOS 13.3+ (Apple Silicon), Windows 10/11 x64, Linux x86_64 (glibc 2.39+)
- RAM: 8GB minimum, 16GB+ recommended
- Disk: At least 10GB free space (models take up space)
- GPU (optional): NVIDIA GPU (CUDA) or Apple Silicon will provide much better experience, but pure CPU can also run it, just slower
- Python (if running from source): 3.11+
In short: a mainstream personal computer is sufficient, no server required.
Step 1: Install VoiceStudio
The project provides ready-made installers (DMG / MSI / AppImage). Just download the package for your system from the Release page. After installation, the first launch will automatically create a Python environment and download default models. The first launch may take a few minutes, please be patient.
Note for macOS users: The first time you open it, you need to right-click → "Open" for one-time authorization. Intel Macs need to use a remote backend solution since there's no available local Python backend.
If you prefer the command line, you can also run from source:
bash
## Clone the repository
git clone https://github.com/debpalash/VoiceStudio.git
cd VoiceStudio

## Install dependencies and start the desktop version
bun install
bun run desktop

## Or run the browser UI version
bun run dev
Once started successfully, the backend will serve REST API on localhost:3900, and all our subsequent operations will go through this interface. You can verify the service is running by visiting http://localhost:3900.
Why care about this port? Because VoiceStudio's desktop shell and Python backend communicate through
localhost:3900. If you want to write scripts calling its API, just point to this address. It's also an endpoint compatible with OpenAI API format, which we'll use later.
Step 2: Clone Your First Voice
The principle behind voice cloning is zero-shot synthesis — you only need to provide 3~15 seconds of clean speech as reference, and the system can mimic this voice tone to generate new speech. No training required, no GPU clusters needed, just a recording.
Prepare Reference Audio
Use your phone to record 5~10 seconds of speech. Pay attention to these points:
- One person speaking, no multi-person conversations
- Quiet environment, no background music or echo
- Normal speaking pace, consistent with the tone you want for generated speech
Save this audio as reference.wav. 5 seconds is enough, but 10 seconds gives better results.
Clone + Generate via API
VoiceStudio provides an OpenAI-compatible API. If you've used OpenAI's TTS endpoint, you can directly reuse your code — just change the base_url:
python
from openai import OpenAI

## Point base_url to the local VoiceStudio backend
client = OpenAI(
    base_url="http://localhost:3900/v1",
    api_key="local"  # No real key needed for local use
)

## Generate speech
with client.audio.speech.with_streaming_response.create(
    model="tts-1",            # Engine ID
    voice="<your voice profile ID>",  # Cloned voice ID
    input="This is speech generated using my own cloned voice.",
    response_format="wav",
) as response:
    response.stream_to_file("output.wav")

print("✅ Speech generated to output.wav")
In the desktop app, you can first create a Voice Profile by uploading reference audio through the Voice Cloning panel, get the ID, and fill it into <voice profile ID> in the code above.
Why OpenAI compatible format? This lets you directly use the
openaiPython package without installing additional SDKs, minimizing code changes — just modify thebase_urlline, everything else stays the same. For developers who've used OpenAI API, this means nearly zero learning curve.
Step 3: Transcribe Audio Files
Next, let's convert an audio file to text. VoiceStudio comes with 11 ASR engines built-in, with WhisperX as default, supporting ~100 languages and even word-level timestamps.
Again, call via API:
python
from openai import OpenAI

client = OpenAI(
    base_url="http://localhost:3900/v1",
    api_key="local"
)

with open("meeting_record.mp3", "rb") as audio_file:
    transcription = client.audio.transcriptions.create(
        file=audio_file,
        model="whisperx",         # Specify ASR engine
        response_format="verbose_json"  # Return detailed JSON with timestamps
    )

## Print transcription results
for segment in transcription.get("segments", []):
    start = segment["start"]
    end = segment["end"]
    text = segment["text"]
    print(f"[{start:.2f}s → {end:.2f}s] {text}")

## Or directly save as SRT subtitle file
transcription_srt = client.audio.transcriptions.create(
    file=open("meeting_record.mp3", "rb"),
    model="whisperx",
    response_format="srt"
)
with open("output.srt", "w", encoding="utf-8") as f:
    f.write(transcription_srt)
After running, you'll get an output.srt subtitle file that can be directly attached to a video player to see the results.
Engine selection tips: If your computer has a GPU, use WhisperX or Faster-Whisper (CUDA accelerated). For pure CPU, try Moonshine (lightweight). Apple Silicon users can use MLX Whisper. Different engines perform differently across languages; for Chinese, both WhisperX and Faster-Whisper work well.
Real-World Example: Generate an Audiobook with Your Cloned Voice
Now for something interesting. Let's combine the two things we learned above — starting from an article, use a cloned voice to read it aloud and generate a complete audiobook audio file.
Overall Approach
- Use your cloned voice Profile to read the article
- VoiceStudio supports multi-paragraph synthesis for long texts, automatically concatenating them
- Export as
.m4bor.wavformat
Practical Code
python
from openai import OpenAI

client = OpenAI(
    base_url="http://localhost:3900/v1",
    api_key="local"
)

## Assume you have a technical article
article = """
Today let's talk about service discovery in microservice architecture.
In distributed systems, service instances' IPs and ports can change at any time,
so we need a mechanism for services to discover and communicate with each other.
Common solutions include Consul, Eureka, and Nacos.
Consul is HashiCorp's product, supporting health checks and service registration.
Eureka is open-sourced by Netflix, focusing on client-side discovery.
Nacos is open-sourced by Alibaba, providing configuration management as well.
"""

## Read with cloned voice
with client.audio.speech.with_streaming_response.create(
    model="tts-1",
    voice="<your voice profile ID>",
    input=article,
    response_format="wav",
) as response:
    response.stream_to_file("audiobook_chapter_1.wav")

print("✅ Audiobook Chapter 1 generated")
If you have multiple chapters, just write a loop to batch generate them. VoiceStudio's batch queue feature can also be operated directly in the desktop app — create a task for each chapter, and it will process them in order and show progress.
After generating all chapters, you can use ffmpeg to concatenate them into a complete audio file:
bash
ffmpeg -f concat -safe 0 -i chapters.txt -c copy full_audiobook.wavWhere chapters.txt looks like:
file 'chapter_1.wav'
file 'chapter_2.wav'
file 'chapter_3.wav'
Common Issues & Troubleshooting
Q: Generated speech is slow/laggy. What should I do?
Check whether your GPU is properly recognized. In Settings, check GPU status and confirm it shows CUDA or MPS instead of CPU. If you only have 4GB VRAM, some large engines will automatically fall back to CPU mode. You can adjust this in Settings → Performance.
Q: Cloned voice quality is poor?
Reference audio quality directly determines cloning results. Ensure: (1) Only one person speaking; (2) No background noise; (3) Tone matches what you want for generated speech. 5~15 seconds is the optimal range; longer audio isn't necessarily better.
Q: Model download is very slow on first install?
VoiceStudio's models come from Hugging Face. If you're in China, you can configure a Hugging Face mirror or manually specify a Token in Settings. The project docs have a detailed Hugging Face Token setup guide.
Q: Can I run it on a server?
Yes. VoiceStudio supports Docker deployment (CUDA/ROCm/CPU all supported), and can also use remote Worker mode. Other machines on the LAN can connect via the localhost:3900 API. Just remember to configure security settings — remote access requires setting an API Key.
Summary
In this tutorial, we've accomplished three things: installing VoiceStudio, cloning a voice and generating speech, transcribing audio to subtitles, and finally, an audiobook实战 (hands-on example). The core workflow is straightforward — install the software → prepare reference audio → call API to generate. No server configuration needed, no money spent on API credits, audio data stays completely local.
If you want to explore further, check these out:
- Complete Video Dubbing Pipeline: VoiceStudio includes Transcribe → Translate → Preserve Speaker → Synthesize → Export Video workflow, perfect for multilingual videos
- Multi-voice Scripts: For audiobook scenarios, create multiple Voice Profiles, use different voices for different characters
- MCP Server: If you use Agent tools like Claude Code or Cursor, you can integrate VoiceStudio's MCP skills to let Agents directly call voice capabilities
VoiceStudio is currently in Active Beta stage, with over 10,000 Stars indicating high community activity. As a completely local, free, feature-rich voice processing platform, it's worth trying out on your machine.