How to Build an Automated Security Scanning Pipeline with Claude Code Skills
A step-by-step guide to building a complete automated security scanning pipeline using Anthropic’s open-source defending-code-reference-harness. Learn how to go from threat modeling and vulnerability scanning to intelligent triage and automated patch generation, and adapt the pipeline to your own Python, Java, or C/C++ projects.
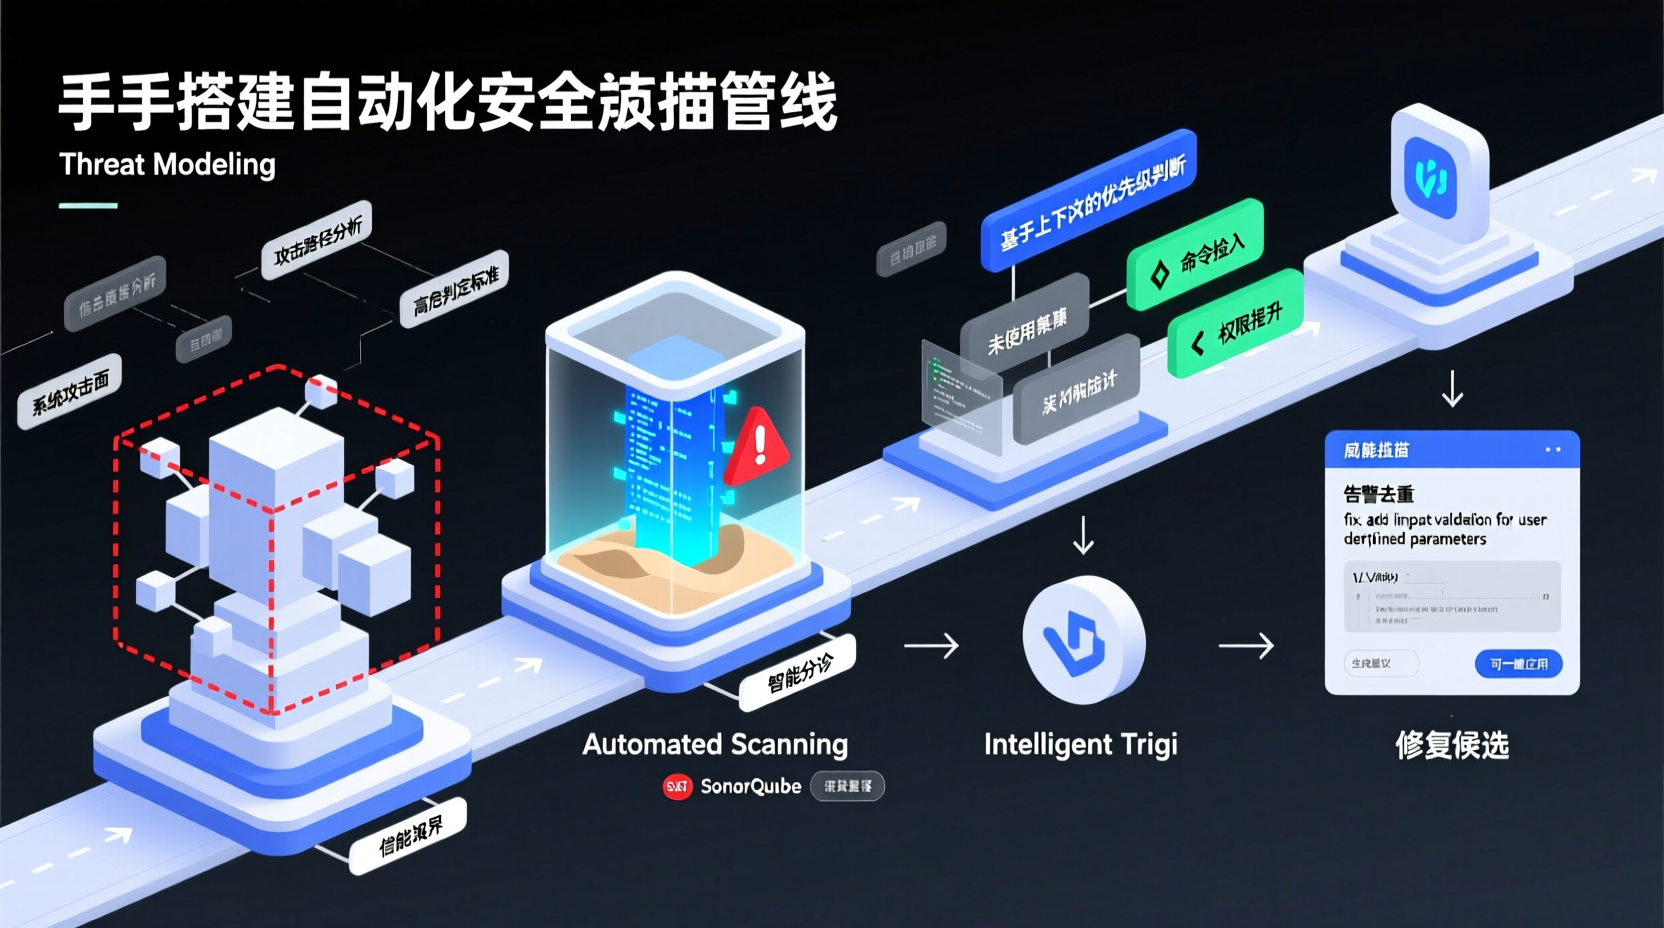
How to Build an Automated Security Scanning Pipeline with Claude Code Skills: From Threat Modeling to Auto-Fix
Ever feel the pain of manually reviewing SonarQube and SAST scan results before every release? Hundreds of alerts pile up, but only a dozen actually need fixing. The rest are false positives. Even worse, you constantly repeat yourself explaining context and digging through docs to confirm what can be ignored.
If this sounds familiar, this tutorial is for you. I'll walk you through using Anthropic's open-source defending-code-reference-harness to run a complete security scanning pipeline: Threat Modeling → Auto-Scanning → Intelligent Triage → Patch Generation. The whole process takes about one to two days. Once it's running, you can adapt this pattern to your own projects.
💡 All operations in this guide can be done locally. The scanning phase does not touch production code.
Prerequisites
- Claude Code: Anthropic's CLI coding agent. You'll need API access (direct API Key, or via Bedrock/Vertex/Azure).
- Docker: Required to run target code in isolated containers for the autonomous pipeline.
- Python 3.10+: The pipeline's orchestration scripts rely on Python.
- gVisor: Google's sandbox runtime for isolating autonomous scanning agents (installed automatically via script).
On the knowledge side, you should be comfortable reading a Dockerfile and understand basic threat modeling concepts like attack surfaces and trust boundaries. You don't need to be a security expert; regular backend developers can easily follow along.
Step 1: Run Your First Static Scanning Loop (30 Minutes)
Before automating everything, we'll use Claude Code's interactive Skills to run the workflow manually. This step only reads and writes files—no sandbox needed—making it the safest starting point.
1. Clone the Repo & Enter Claude Code
bash
git clone https://github.com/anthropics/defending-code-reference-harness
cd defending-code-reference-harness
claude
## Optional: specify the model for sub-agents
export CLAUDE_CODE_SUBAGENT_MODEL=claude-sonnet-4-20250514
Once inside Claude Code, run /quickstart to explore the project structure. This skill guides you through a complete end-to-end experience.
2. Build a Threat Model
Many developers scan, get a wall of results, and don't know where to start. The root cause? Skipping the threat model. A threat model answers two core questions: "Where are this system's attack surfaces, and what actually counts as high-risk?"
bash
## Execute in the Claude Code interactive interface
> /threat-model bootstrap targets/canary
This step analyzes the target codebase (targets/canary is a sample target) and generates a THREAT_MODEL.md. It maps out component boundaries, trust boundaries, and high-risk paths. All subsequent scanning and triage will reference this document to filter out false positives.
3. Execute Static Scanning
bash
> /vuln-scan targets/canaryThe scan is static—it does not compile or run the code. Instead, it relies on Claude to read the source and identify potential vulnerabilities. Outputs are written to targets/canary/VULN-FINDINGS.json and a corresponding Markdown report.
4. Triage & Deduplicate
bash
> /triage targets/canary/VULN-FINDINGS.jsonThis step handles three tasks: Validation (confirming real vulnerabilities), Deduplication (merging similar findings), and Prioritization (sorting by severity). The final output includes TRIAGE.json and TRIAGE.md.
💡 Pro tip: The
canarytarget intentionally contains vulnerable demo code./triagewill correctly flag bugs in test code as false positives. To see the full confirm/dedupe/false-positive workflow in action, point it at your own codebase.
5. Generate Patch Candidates
bash
> /patch ./TRIAGE.json --repo targets/canary/patch reads the triage results and generates candidate fixes for each confirmed vulnerability, outputting them to the PATCHES/ directory. These are candidate patches, not code merged directly into main. You still need to review them.
After these five steps, your working directory should contain: THREAT_MODEL.md, VULN-FINDINGS.{json,md}, TRIAGE.{json,md}, and a PATCHES/ folder. Congratulations, you've just manually walked through a DevSecOps pipeline.
Step 2: Run the Autonomous Pipeline on a Real C/C++ Library
The static scan above only reads source code. Next, we'll run an execution-verification level pipeline—actually compiling and running the target code, using AddressSanitizer (ASAN) to catch memory errors.
Initialize the Environment
bash
## Create virtual environment and install project dependencies
python3 -m venv .venv && .venv/bin/pip install -e .

## Install gVisor sandbox and build agent images
./scripts/setup_sandbox.sh

## Set up API credentials
export ANTHROPIC_API_KEY=sk-ant-...
Run the Pipeline
bash
bin/vp-sandboxed run drlibs --model <model-id> --runs 3 --parallel --stream --auto-focusThis command launches 3 independent find agents in parallel. Each runs the target library in ASAN mode inside a gVisor-isolated container. --stream lets you watch progress in real-time, while --auto-focus allows the pipeline to automatically discover different subsystems in the code to explore in parallel.
Here’s the 7-step internal workflow:
| Phase | What it does |
|---|---|
| Build | Compiles the target into a Docker image with ASAN enabled |
| Recon | A lightweight agent reads the source code to map attack surfaces |
| Find | Multiple find agents parallelize crafting malformed inputs to trigger crashes |
| Verify | An independent grader agent reproduces the crash in a clean container |
| Dedupe | A judge agent determines if it's a new bug or a duplicate of a known issue |
| Report | Generates a structured exploitability analysis report for each unique bug |
| Patch | Generates fixes, verifies they pass the test suite, and confirms they no longer crash |
Generate Patches from Results
bash
bin/vp-sandboxed patch results/drlibs/<timestamp>/ --model <model-id>Results are output to the results/drlibs/<timestamp>/ directory. Alternatively, you can use Claude Code directly to ask it to explain findings as they appear:
bash
claude
> run the pipeline on drlibs and explain findings as they come
Real-World Example: Migrating the Pipeline to Your Java Spring Boot Project
The reference pipeline defaults to C/C++ memory vulnerabilities, but its architecture is language-agnostic. Adapting it to Java requires answering three questions:
- What signals count as a finding? For C/C++, it's ASAN crash signatures; for Java, it could be uncaught exceptions, canary files being written, or specific DNS callbacks.
- What does a PoC look like? In C/C++, it's a crash input file; in Java, it could be an HTTP request sequence, transaction list, or custom test harness.
- How to compile & run? Use your build tool inside a Docker container.
Here's how to do it:
bash
claude

## First, point the Skills to your own code
> /threat-model bootstrap-then-interview ~/code/my-spring-service
> /vuln-scan ~/code/my-spring-service
> /triage ~/code/my-spring-service/VULN-FINDINGS.json --repo ~/code/my-spring-service

## Then use /customize to adapt the pipeline to your tech stack
> /customize use ~/code/my-spring-service/{THREAT_MODEL.md,VULN-FINDINGS.json} and ./TRIAGE.md
After /customize finishes, you'll get a targets/my-spring-service/ directory. Verify it with a smoke run:
bash
bin/vp-sandboxed run my-spring-service --model <model-id> --runs 1For Java projects, you'll need a Dockerfile that includes Maven/Gradle build steps, JVM startup flags (e.g., enabling the Security Manager), and your PoC verification script. The pipeline will use this Dockerfile to build the target inside the container.
Pitfalls & Tips
- Sandbox is mandatory: The
runandpatchcommands will execute target code in gVisor containers. If the sandbox environment isn't set up correctly, the commands will refuse to run. Always run./scripts/setup_sandbox.shfirst. - Sub-agent model selection: Remember to set
CLAUDE_CODE_SUBAGENT_MODELbefore running any pipeline commands. Otherwise, sub-agents might default to an unsuitable model. - Handling duplicates: Running the pipeline multiple times will cause
/triageto deduplicate across rounds. Keep a record of confirmed vulnerabilities inknown_bugsso subsequent scans focus only on new issues. - Scanning isn't a silver bullet: Even with execution verification, findings still require human review. Severity judgment heavily depends on your actual deployment environment.
- Rate limits: Large-scale parallel scanning can trigger API rate limits. Start with
--runs 2and scale up gradually.
Summary
Today, we built a complete security scanning pipeline from scratch: we first walked through an end-to-end workflow (Threat Modeling → Static Scanning → Triage → Patch Suggestions) using interactive Skills, then ran an execution-verified autonomous pipeline, and finally discussed how to port it to a Java tech stack.
The core value of this pattern isn't just "what it can find," but establishing an iterative security scanning methodology: shrink the attack surface with a threat model, filter false positives via execution verification, focus on new findings through cross-round deduplication, and generate candidate patches while retaining human review for the final say.
Next step: Pick a real project from your team (doesn't have to be huge), use /quickstart to hook it into the pipeline. After the first run, you'll have an entirely new perspective on your project's security posture.
Project Repository: https://github.com/anthropics/defending-code-reference-harness
Anthropic notes on GitHub that this project does not accept contributions, but it serves as an excellent reference implementation. If you're interested in automated security scanning, I also recommend keeping an eye on Claude Security (Anthropic's managed security scanning product) and their accompanying best practices blog post.